For decades, the craft of making steel rule dies was defined by manual skill. Master die-makers would spend years honing their ability to saw plywood by hand, bend steel rule with manual benders, and meticulously fit each piece into place. It was—and in many shops still is—a craft that demands patience, precision, and an intimate understanding of material behavior.
But the industry has evolved. Today, the demands on die-making shops are greater than ever. Customers expect shorter lead times, tighter tolerances, and more complex geometries. Volume fluctuations require rapid turnarounds. And the margin for error has shrunk to nearly zero.
In my years managing die-making operations, I have witnessed this evolution firsthand. The shops that thrive today are those that have successfully integrated automation into their workflows—not to replace skilled craftsmen, but to amplify their capabilities. Two machines have been particularly transformative in this regard: the laser cutting machine for die boards and the auto blade bending machine for steel rule processing.

In this article, I will walk you through the complete workflow of producing a flat cutting die using these two technologies. Whether you are considering upgrading your shop or simply want to understand how modern die-making operates, this guide will give you a clear picture of the process.
Why Laser and Automation?
Before we dive into the step-by-step process, let me address why this combination has become the gold standard for flat die production.
Traditional methods rely on a jig saw to cut die boards manually. The operator follows a printed pattern, guiding the saw blade along the lines. While skilled operators can achieve excellent results, the process is inherently limited by human precision, fatigue, and speed. Complex patterns with tight radii or intricate internal details are challenging to execute consistently.
Laser cutting eliminates these limitations. A laser cutter follows a digital file with microscopic precision. It cuts clean, consistent kerfs (slots) with perfect perpendicularity. It handles intricate geometries with ease. And it does so at speeds that manual sawing cannot match.
Similarly, manual bending relies on the operator’s skill to produce consistent bends. Complex shapes require multiple steps and careful measurement. An auto blade bending machine, by contrast, reads a digital program and produces perfectly formed rule segments with repeatable accuracy. It eliminates the variability that comes with manual operation and drastically reduces setup time.
Together, these two machines create a workflow that is faster, more accurate, and more repeatable than traditional methods—while still allowing skilled technicians to apply their expertise in the final assembly and quality control stages.
The Complete Workflow: From Digital File to Finished Die
Let me walk you through the process step by step, as we execute it in our own shop.
Step 1: Design and File Preparation
Every die begins with a design. The customer provides a die layout—typically in a format such as DXF, DWG, or AI—that defines the cutting, creasing, and perforating lines for their product. This file is the blueprint for everything that follows.
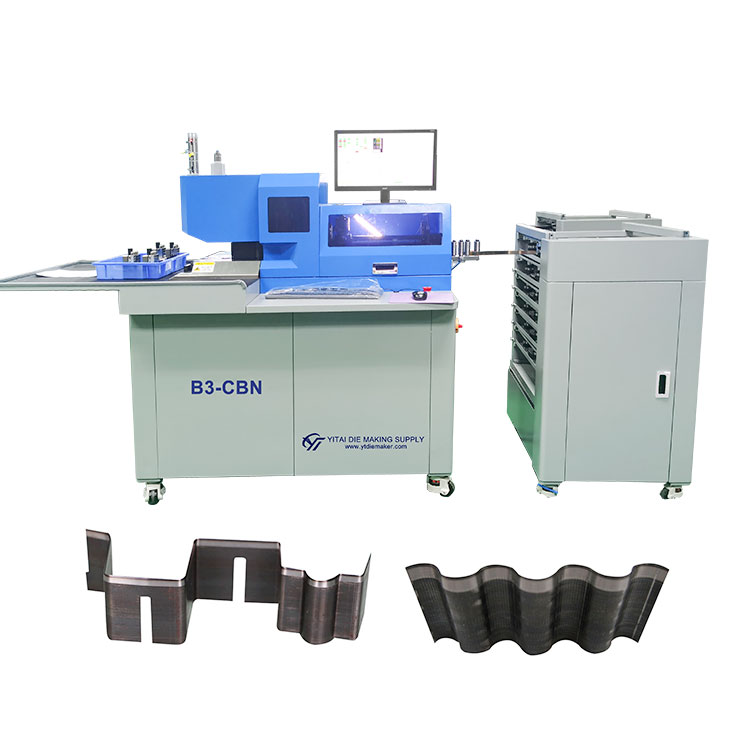
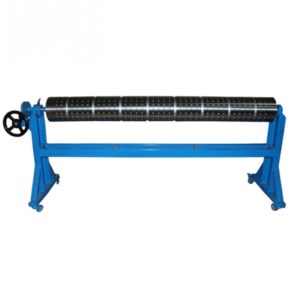
B3-CBN Model Flat die automatic bending machine
In our workflow, the first critical step is file preparation. We import the customer’s design into our die-making software and perform a thorough review:
- Line assignment: We verify that every line is correctly assigned as cutting, creasing, or perforating. This determines how the laser cutter will process the die board and how the auto blade bender will form the rule.
- Kerf compensation: The laser cutter removes a small amount of material (the kerf) when cutting the slot. Our software automatically compensates for this, ensuring that the resulting slot is precisely the correct width for the steel rule that will be inserted.
- Bridge placement: We identify where notches (bridges) are needed to allow ejection material to pass through. These are marked in the file so that the laser cutter can create the appropriate gaps in the die board.
- Rule bending data: Once the design is finalized, we generate bending programs for the auto blade bender. These programs contain the precise bend angles, radii, and lengths for every rule segment.
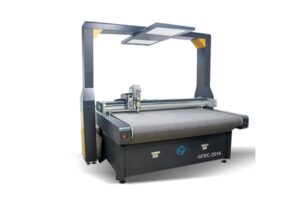
Step 2: Laser Cutting the Die Board
With the digital file prepared, we move to the laser cutting machine. The die board material—typically high-quality birch plywood or acrylic, depending on the application—is secured on the machine’s work table.
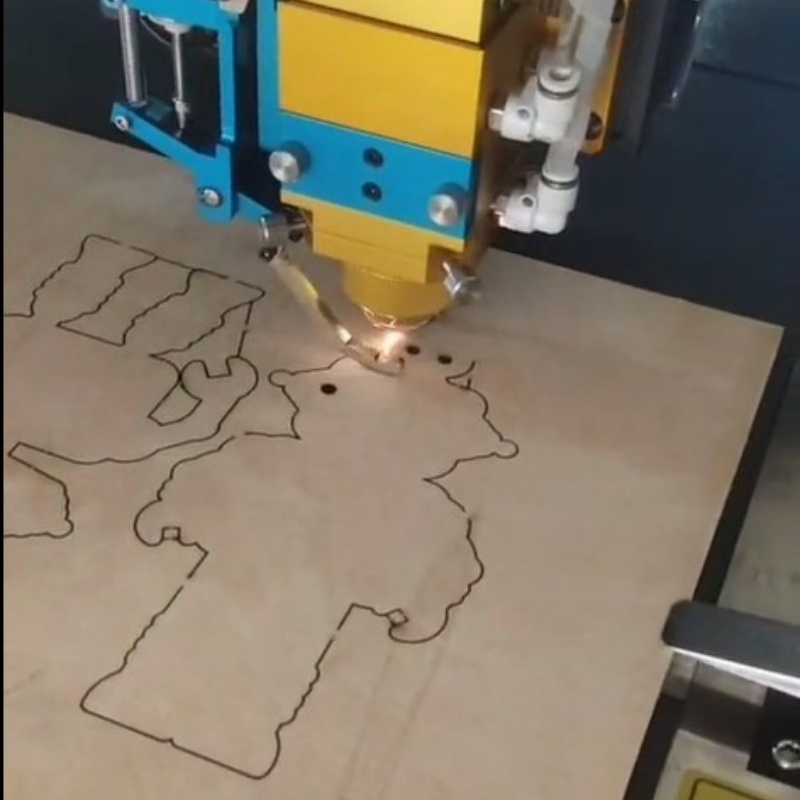
Die Board Laser Cutter Automactic
The laser cutter operates based on the digital file, cutting the kerfs (slots) that will house the steel rule. Here is what happens during this stage:
- Cutting the kerfs: The laser beam follows the cutting lines defined in the file, vaporizing the material to create slots of precise width and depth. The width of the kerf is matched to the thickness of the steel rule being used—typically between 0.71mm (2pt) and 1.42mm (4pt) for standard applications.
- Cutting internal details: Unlike manual sawing, the laser cutter handles internal cutouts with ease. It can cut sharp internal corners, tight radii, and complex geometries that would be difficult or impossible to achieve with a jig saw.
- Cutting bridges: Where the design calls for bridges (gaps in the die board that allow ejection rubber to pass through), the laser cutter creates these openings automatically. The size and spacing of bridges are determined by the file, ensuring consistency across the entire die.
- Cutting registration holes: For dies that will be used on automated presses, we often cut registration holes into the die board. These align with pins on the press, ensuring accurate positioning for every run.
Quality check: Once the laser cutting is complete, we inspect the die board. We verify that all kerfs are clean and free of debris, that bridges are correctly positioned, and that the board lies flat. Any residue from the cutting process is removed, and the board is prepared for the next stage.
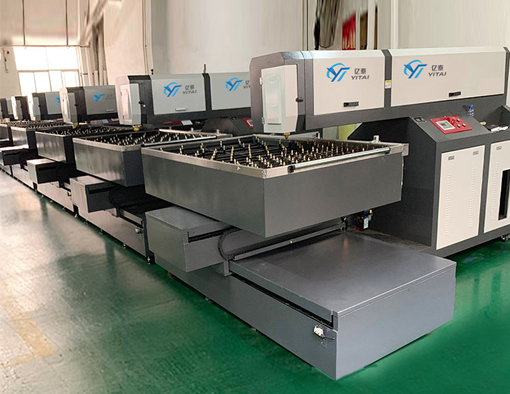
Step 3: Auto Bending of Steel Rule
While the die board is being laser cut, our auto blade bending machine is processing the steel rule. This machine is the heart of our modern rule processing workflow.

Steel Rule Bending
The operator loads the bending program generated during the design phase. The machine then processes the steel rule in a continuous operation:
- Feeding: The machine automatically feeds steel rule from a coil or straight length into the processing head. The machine handles the standard 1-4 point thickness range that covers most applications.
- Cutting to length: The machine cuts the rule to the precise length required for each segment. The cuts are square and clean, ensuring a tight fit in the die board kerfs.
- Bending: The machine performs the required bends based on the program. It handles sharp corners, gradual radii, and compound bends with consistent accuracy. Each bend is formed at the exact angle and position specified in the design.
- Notching: For segments that require bridges, the machine can perform notching operations as part of the same workflow. Notches are cut at the specified positions and depths.
- Marking: In some setups, the machine can mark each rule segment with an identifier that corresponds to its position in the die. This simplifies the assembly process for the technician.
Output: The result is a complete set of pre-cut, pre-bent, pre-notched steel rule segments, ready for assembly. Each piece matches the design specifications precisely.
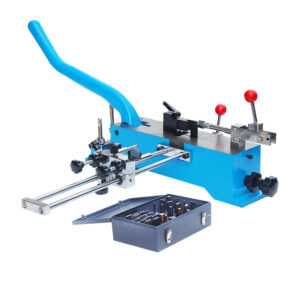
Step 4: Assembly
With the die board cut and the rule segments formed, we move to the assembly stage. This is where the skilled technician’s expertise comes to the forefront.
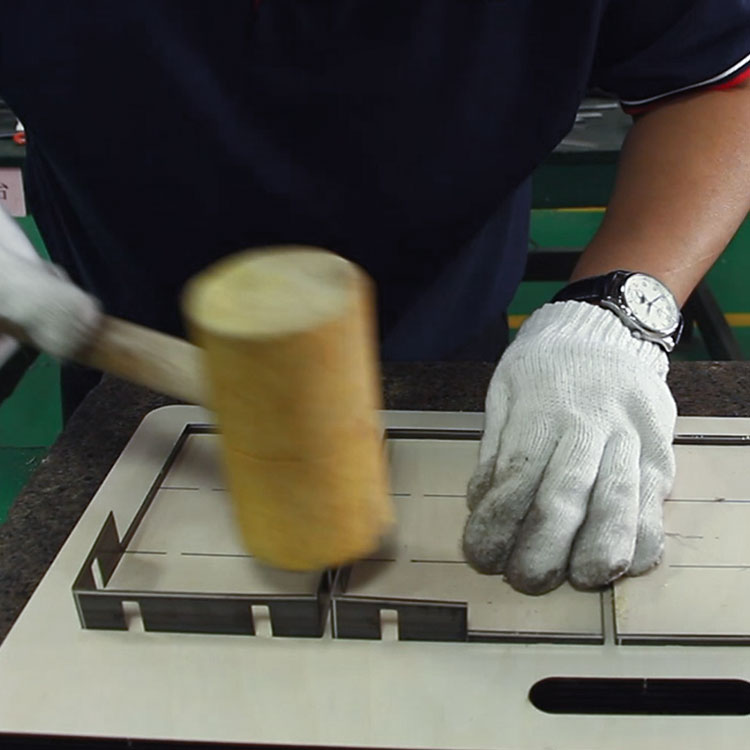
Rule Insertion and Assembly
The assembly process follows a systematic approach:
- Sorting: The rule segments are sorted according to their positions in the die. If the bending machine has marked the segments, this step is straightforward.
- Insertion: Starting with the longest, straightest rule segments first, the technician inserts each piece into its corresponding kerf in the die board. A light hammer or mallet is used to seat the rule fully. The rule puller tool we discussed in a previous article is invaluable here for making fine adjustments.
- Corner fitting: At intersections where rule segments meet, the technician verifies that the mitered corners align perfectly. A gap of even a few tenths of a millimeter can affect cutting quality.
- Height verification: After all rules are inserted, the technician checks the height of each rule segment. All cutting rules should be at the same height, and creasing rules at their specified height. Variations are corrected by tapping the rule deeper or shimming as needed.
- Bridge inspection: The technician verifies that bridges are correctly positioned and that no rule segments have shifted to block them.
Step 5: Ejection Material Application
A die is not complete without ejection material (typically rubber or foam). This material is what pushes the cut material away from the die after each stroke, preventing jams and ensuring consistent production.
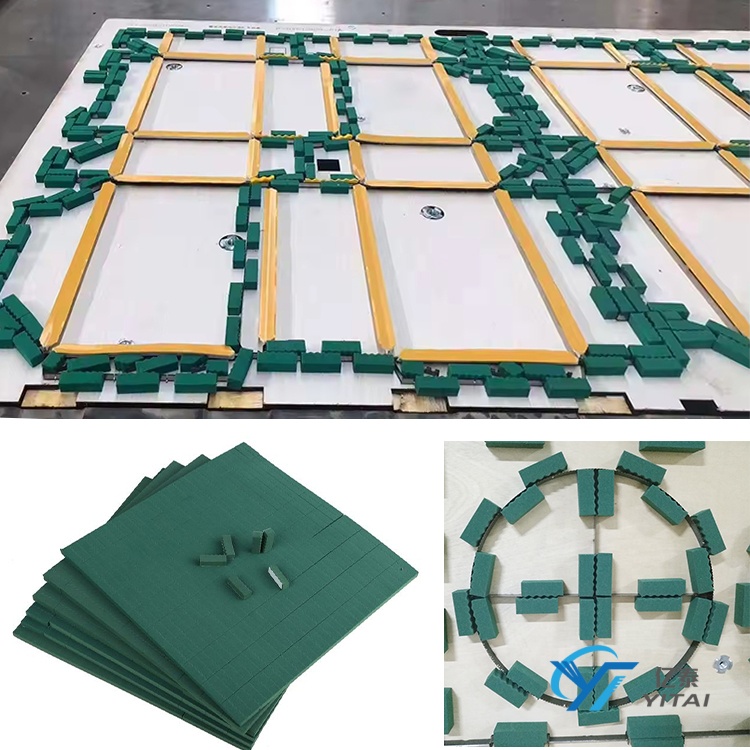
Die Making Rubber
In our workflow, this stage involves:
- Selecting the appropriate ejection material: Different materials and applications require different densities and thicknesses of ejection rubber. The technician selects the appropriate type based on the job specifications.
- Cutting and fitting: Ejection material is cut to size and fitted into the die board around the rule segments. The laser-cut bridges provide natural channels for the ejection material.
- Adhesion: The ejection material is secured using adhesive. Care is taken to ensure that the material does not interfere with the cutting edges of the rule.
Step 6: Quality Control and Testing
Before any die leaves our shop, it undergoes rigorous quality control. This is a non-negotiable step in our workflow.
Our QC process includes:
- Visual inspection: Every rule segment is inspected for proper seating, correct height, and secure fit. Bridges are checked for clearance. Ejection material is verified for correct placement.
- Dimensional verification: Key dimensions are measured against the design file using calibrated tools. For critical applications, we use optical measurement systems to verify tolerances.
- Test cutting: Whenever possible, we perform a test cut on materials that match the customer’s specifications. This allows us to verify cut quality, crease quality, and waste removal before the die is shipped.
- Documentation: Each die is logged with its specifications, test results, and any notes relevant to future re-knifing or maintenance.
Comparing the Modern Workflow to Traditional Methods
To appreciate the impact of this modern workflow, let me offer a comparison based on our own shop’s metrics:
| Aspect | Traditional (Manual) | Modern (Laser + Auto Bender) |
|---|---|---|
| Die board cutting time | 2-4 hours for a standard die | 15-30 minutes |
| Rule bending time | 1-3 hours, depending on complexity | 10-20 minutes (unattended) |
| Accuracy | Dependent on operator skill | Repeatable to ±0.1mm |
| Complexity limitations | Limited by saw blade access | No practical limitations |
| Rework rate | 5-10% for complex designs | <1% |
| Training time for operators | 12-24 months for proficiency | 1-3 months for machine operation |
These numbers speak for themselves. The modern workflow does not just produce dies faster—it produces them more consistently, with fewer errors, and with a much lower barrier to entry for new technicians.
Is This Workflow Right for Your Shop?
If you are considering investing in laser cutting and auto blade bending equipment for your die-making shop, here are a few factors to consider:
Volume: This workflow is most beneficial for shops that produce a steady volume of flat dies. The initial investment in equipment is significant, but the per-die cost savings and reduced rework quickly justify the expense for high-volume operations.
Complexity: If your work involves highly intricate designs with tight radii, small internal cutouts, or complex geometries, the laser and auto bender combination is almost essential. These jobs are difficult to execute consistently with manual methods.
Lead time requirements: Customers increasingly expect shorter lead times. The modern workflow allows you to compress production timelines without sacrificing quality.
Skilled labor availability: Finding and training skilled manual die-makers is increasingly challenging. Automating the most labor-intensive parts of the process reduces your dependence on a shrinking pool of highly specialized labor.
Conclusion
The integration of laser cutting machines and auto blade bending machines represents a fundamental shift in how flat dies are produced. It is a shift that has allowed forward-thinking die-making shops to meet the demands of modern packaging, printing, and converting industries with speed, precision, and consistency.
But let me be clear about one thing: automation does not replace skill. In our shop, the laser cutter and auto bender are tools—extraordinarily capable tools, but tools nonetheless. The skilled technicians who assemble the dies, apply ejection material, and perform quality control are as essential as ever. What automation does is free them from the most repetitive and physically demanding aspects of the work, allowing them to focus on the precision and craftsmanship that define a truly exceptional die.
If you are ready to take your die-making operation to the next level, I encourage you to explore the capabilities of laser cutting and auto blade bending technology. The investment is substantial, but the returns—in speed, accuracy, and customer satisfaction—are well worth it.
For more information on laser cutting machines, auto blade bending machines, and complete die-making equipment solutions, please contact our sales team at sales_diemaking@yitaipacking.com.